For many, the day doesn’t truly begin until that first cup of coffee is in hand. But are you aware of something that could be tarnishing the quality and taste of your coffee? A dirty coffee grinder. A coffee grinder with leftover residue and one that is generally not clean can affect future coffee beans you grind and alter the outcome of your coffee. A clean coffee grinder isn’t just about hygiene, it’s about ensuring every cup you brew is as delicious as possible. In this guide we are going to explain how to clean a coffee grinder so your coffee can be as fresh and flavorful as it’s intended to be.
You might also like: The best coffee grinders.
Why Cleaning Your Coffee Grinder Matters

The process of grinding fresh coffee beans is as satisfying as it is necessary for the freshest and most flavorful coffee possible. But, like all good things, it comes with its responsibilities. One of those is ensuring that the grinder remains clean. Here’s why this is so crucial:
Buildup of Old Coffee Grounds and Oils: Every time you grind coffee beans, tiny particles and oils from the beans are left behind. Over time, these remnants accumulate, creating a buildup that’s not just unsightly but can also impact the performance of your grinder. These old grounds and oils can contaminate your next grind, leading to unwanted flavors.
Stale Grounds and Flavor Impact: Imagine seasoning a fresh dish with old, stale spices. The result wouldn’t be appetizing. The same goes for coffee. Grinding fresh beans in a dirty grinder means the stale grounds can mix with the new, tainting the flavor. Instead of a bright, aromatic cup, you might end up with one that’s dull and off-tasting.
Maintenance and Longevity of the Grinder: Regular cleaning ensures that your grinder functions smoothly. Old grounds can clog the mechanism, making it work harder and potentially leading to malfunctions or breakdowns. By keeping it clean, you’re not only ensuring a better cup of coffee but also extending the life of your grinder, making it a worthy investment in the long run.
Types of Coffee Grinders
Coffee grinders might seem straightforward but delve a little deeper, and you’ll find there’s more to them than meets the eye. While there are many types of coffee grinder, primarily, there are two types of grinders that coffee drinkers use at home: blade grinders and burr grinders. Each has its own set of advantages, and the cleaning methods differ slightly for each.
Blade Grinders
Blade grinders use a set of sharp blades that spin at high speeds to chop and break down the coffee beans. The result is somewhat inconsistent, with a mix of fine and coarse particles. They’re often more affordable and compact, making them a popular choice for casual coffee drinkers or those new to grinding at home.
This is one of our favorite blade grinders.
Cleaning: Due to their simple design, blade grinders can be easier to clean. However, the blades can be sharp, so caution is needed. Typically, a brush or cloth can be used to wipe away old grounds, and occasionally, a damp cloth can be used for a more thorough cleaning.
Burr Grinders
Burr grinders are the choice of many coffee enthusiasts and professionals. They use two burrs (either flat or conical) that grind the beans to a consistent size. The distance between the burrs can be adjusted, allowing for a range of grind sizes, from fine espresso to coarser grinds suitable for French presses.
This is one of our favorite burr grinders.
Cleaning: Burr grinders require a bit more attention when cleaning. The burrs can become clogged with coffee grounds and oils, so regular cleaning is essential. They often need to be disassembled for a thorough clean, using brushes and sometimes specialized cleaning products to ensure all residues are removed.
How to Clean a Blade Grinder: Step-by-Step Guide
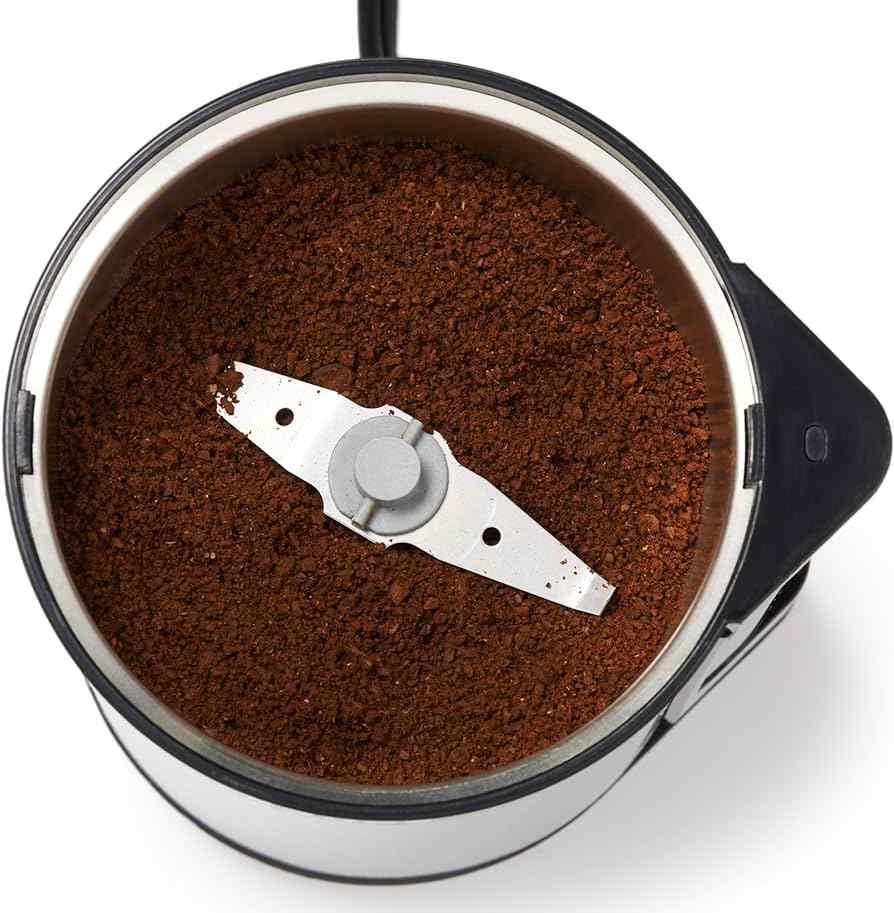
Blade grinders, with their straightforward design, are relatively simple to clean. However, ensuring you do it correctly can make a significant difference in the longevity of the grinder and the taste of your coffee. Here’s a step-by-step guide to help you keep your blade grinder in pristine condition.
Materials Needed:
- Soft brush (a pastry brush or an old toothbrush works well)
- Dry cloth or paper towel
- Damp cloth (for occasional deeper cleans)
- Uncooked white rice (optional, for deep cleaning)
Detailed Steps:
- Unplug the Grinder: Safety first! Always ensure the grinder is unplugged before you begin cleaning.
- Remove Loose Grounds: Turn the grinder upside down and gently tap it to remove any loose coffee grounds.
- Brush Away Residue: Using your soft brush, gently brush away any coffee grounds that are stuck to the blades and the interior of the grinder. Make sure to get into all the nooks and crannies.
- Wipe the Interior: Take a dry cloth or paper towel and wipe the inside of the grinder to remove any lingering coffee dust or oils.
- Deep Cleaning (Occasionally): If you notice a buildup of coffee oils or if the grinder starts to emit a stale coffee smell, it’s time for a deeper clean. Add a small handful of uncooked white rice to the grinder and grind it until it’s powdery. The rice will absorb and remove most of the oils and old coffee residues. Once done, discard the rice powder and brush out any remnants.
- Wipe the Exterior: Use a damp cloth to wipe down the exterior of the grinder, ensuring it looks as good outside as it is clean inside.
- Let it Dry: Before using the grinder again or plugging it in, ensure it’s thoroughly dry, especially if you’ve used the damp cloth inside.
Tips for Effective Cleaning:
- Regular Maintenance: Even if you don’t do a deep clean often, try to brush out old grounds after each use. It takes only a minute and can make a significant difference.
- Avoid Water: It might be tempting to rinse out the grinder, but water can damage the motor and lead to rust. Stick to brushes and dry or slightly damp cloths.
- Monthly Deep Clean: Depending on how often you use your grinder, a monthly deep clean with rice can help maintain its performance and keep your coffee tasting fresh.
How to Clean a Burr Grinder: Step-by-Step Guide
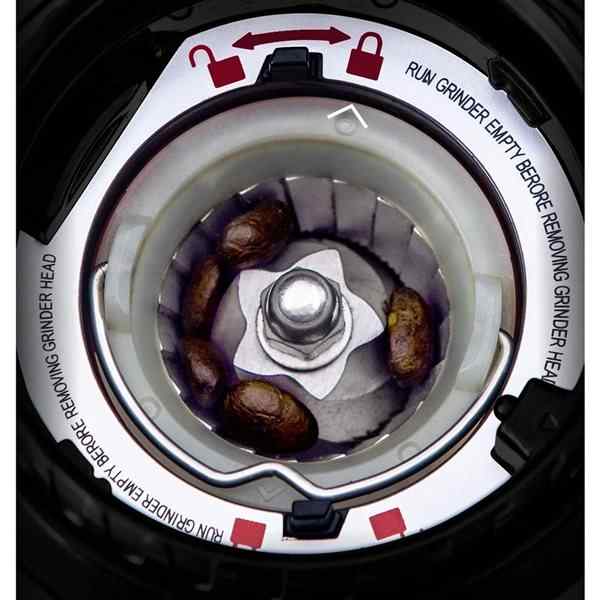
Burr grinders, favored for their precision and consistency, require a bit more attention when it comes to cleaning. The complexity of their design means there are more parts to consider, but with regular maintenance, they can provide years of excellent service. Here’s a comprehensive guide to cleaning your burr grinder.
Materials Needed:
- Soft brush (a grinder brush is ideal, but a soft pastry brush or toothbrush can also work)
- Dry cloth or paper towel
- Damp cloth (for occasional cleaning of the exterior)
- Vacuum with a nozzle attachment (optional, for thorough cleaning)
- Grinder cleaning pellets (optional, for deep cleaning)
Instructions:
- Unplug the Grinder: Always start by unplugging the grinder to ensure safety.
- Remove the Hopper: Most burr grinders have a removable hopper. Take it off and empty any leftover beans. Clean the inside of the hopper with a dry cloth or brush. If it’s particularly oily, you can wash it with mild soap and water, but ensure it’s completely dry before reassembling.
- Disassemble the Grinder: Consult your grinder’s manual on how to take apart the necessary components. Typically, this will involve removing the top burr to access the grinding chamber.
- Brush Out the Burrs: Using your brush, gently clean both the top and bottom burrs. Brush away all the coffee grounds and pay attention to any nooks where particles might be trapped.
- Clean the Grinding Chamber: With the burrs removed, brush out all the coffee grounds from the grinding chamber. If you have a vacuum with a nozzle attachment, this can be an effective way to remove all traces of grounds.
- Deep Cleaning (Occasionally): If you’ve noticed a decrease in grinder performance or a buildup of coffee oils, you can use grinder cleaning pellets. Simply grind these pellets as you would with coffee beans, and they’ll help absorb and remove residues. After using the pellets, grind a small amount of coffee and discard to ensure no remnants of the pellets remain.
- Reassemble the Grinder: Once everything is clean, reassemble the grinder. Ensure the burrs are correctly aligned and that the grind setting is where you want it.
- Wipe Down the Exterior: Use a damp cloth to clean the outside of the grinder, ensuring it looks clean and polished.
- Check the Grind Settings: After cleaning, especially if you’ve disassembled the grinder, it’s a good idea to check the grind settings. Grind a small batch to ensure it’s at your desired coarseness.
Special Attention to the Burrs and Grind Settings:
- Burrs: These are the heart of your grinder. Keeping them clean ensures consistent grinding and prolongs their lifespan. Avoid using water or any cleaning agents on them; a brush is all you need.
- Grind Settings: Always make a mental note (or even a physical one) of your preferred grind setting before disassembling. This ensures you can quickly get back to your favorite grind without much trial and error.
Natural Cleaning Agents vs. Store-Bought Cleaners
When it comes to cleaning your coffee grinder, there are both natural and commercial options available. Each has its own set of advantages and potential drawbacks.
Natural Cleaning Agents
Rice:
- Pros: Easily available, rice is effective at absorbing oils and can help scrub away coffee residues.
- Cons: Can be starchy, which might leave a residue. There’s also a risk of rice grains getting stuck in certain grinders.
Bread:
- Pros: Soft bread can be effective at absorbing coffee oils and can act as a sponge to pick up coffee particles.
- Cons: It might not be as abrasive as rice, so it might not clean as thoroughly. There’s also a risk of bread becoming lodged in the grinder.
Store-Bought Cleaners
Grinder Cleaning Pellets:
- Pros: Specifically designed for cleaning grinders, they’re effective at removing coffee oils and residues. They’re also shaped and sized to avoid getting stuck.
- Cons: More expensive than natural alternatives.
Grinder Cleaning Brushes:
- Pros: Designed to reach all the nooks and crannies of a grinder, they can be more effective than standard brushes.
- Cons: While not overly expensive, they are an additional cost.
Recommendations for Commercial Grinder Cleaning Products
- Urnex Grindz: These are professional-grade cleaning pellets widely recognized in the coffee industry.
- Cafetto Grinder Clean: Another trusted brand offering cleaning pellets suitable for all grinder types.
- Specialized Grinder Brushes: Brands like Pallo and Urnex offer brushes specifically designed for grinder cleaning.
Frequency of Cleaning

Maintaining a clean coffee grinder doesn’t necessarily mean you have to deep clean it every day. However, understanding the right frequency can make a difference in both the taste of your coffee and the longevity of your grinder.
Quick Clean
- Frequency: After each use.
- Method: A simple brush out of old grounds and a wipe down. This prevents old grounds from becoming stale and mixing with fresh coffee.
Deep Clean
- Frequency: Depending on usage, a deep clean can be done every 2-4 weeks for regular users or every couple of months for occasional users.
- Method: This involves disassembling the grinder (as much as is feasible), cleaning each part, and using either natural agents or commercial cleaners to ensure all residues and oils are removed.
Factors for More Frequent Cleaning
- Oily Beans: If you use beans that are particularly oily, you might need to clean your grinder more often. Oily residues can build up faster, affecting the grinder’s performance and the taste of the coffee.
- High Usage: If you grind large amounts of coffee daily, the frequency of deep cleaning should increase.
- Environmental Factors: If you live in a humid area, moisture can mix with the coffee grounds, leading to potential mold or clogging. In such cases, regular cleaning becomes even more crucial.
Troubleshooting Common Grinder Issues
Every tool, no matter how well-maintained, can face issues over time. Coffee grinders are no exception. Here’s a quick guide on addressing common problems:
Inconsistent Grind:
- Potential Cause: Dull burrs, buildup of coffee residues, or misalignment.
- Solution: Clean the grinder thoroughly. If the issue persists, check the alignment of the burrs or consider replacing them.
Grinder Not Turning On:
- Potential Cause: Electrical issues or motor burnout.
- Solution: Ensure the grinder is correctly plugged in and there’s no issue with the power outlet. If the grinder still doesn’t work, it might be time to consult the manufacturer or consider a replacement.
Loud Noises or Vibrations:
- Potential Cause: Something might be lodged in the grinder, or there could be a mechanical issue.
- Solution: Unplug and disassemble the grinder to check for any foreign objects. If nothing is found, the motor or another internal part might be the culprit.
Grinder Clogs Frequently:
- Potential Cause: Oily beans or too fine a grind setting.
- Solution: Clean the grinder and consider switching to a less oily bean. If you’re grinding for espresso, ensure you’re not overloading the grinder.
Grind Adjustments Not Making a Difference:
- Potential Cause: Worn out burrs or an issue with the adjustment mechanism.
- Solution: Consider replacing the burrs. If the problem persists, consult the manufacturer.
When to Replace Parts or the Entire Grinder
- Burrs: If you notice a decline in grind consistency or if the grinder isn’t performing as it used to, the burrs might be worn out. Depending on usage, burrs typically last several years but will need replacement eventually.
- Motor or Electrical Components: If the grinder frequently malfunctions, stops working, or makes unusual noises, it might be time to replace it, especially if it’s an older model.
- General Rule: If the cost of repairs approaches or exceeds half the price of a new grinder, it might be more economical to invest in a new one.
The Final Sip
A clean and well-maintained grinder is essential in the coffee brewing process. Regular cleaning ensures that every cup you brew is a reflection of the bean’s potential, free from the taint of old residues or stale grounds. Also, it ensures that your grinder stands the test of time.

