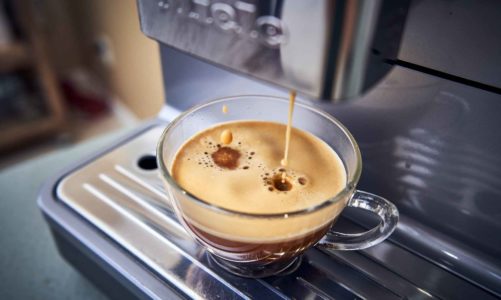
Siphon Coffee is without a doubt an entertaining way to brew your coffee. This coffee contraption looks more like your high school science experiment rather than it does a coffee maker. You might be put off by this, but once you learn how to use a Siphon Coffee maker, the rewards are worth it.
Although a Siphon coffee maker might seem intimidating to use, with the proper technique, you’ll be brewing coffee like a mad scientist. Siphon coffee does take more time and effort to create, but it is worth it for the unique taste and coffee result you get out of it.
“Siphon coffee maker creates an immaculate extraction which helps in unlocking the hidden flavors embedded deep inside a coffee.”
If you like trying different coffee brewing methods, be sure to check out The Chemex.
What Exactly is a Siphon Coffee Maker?
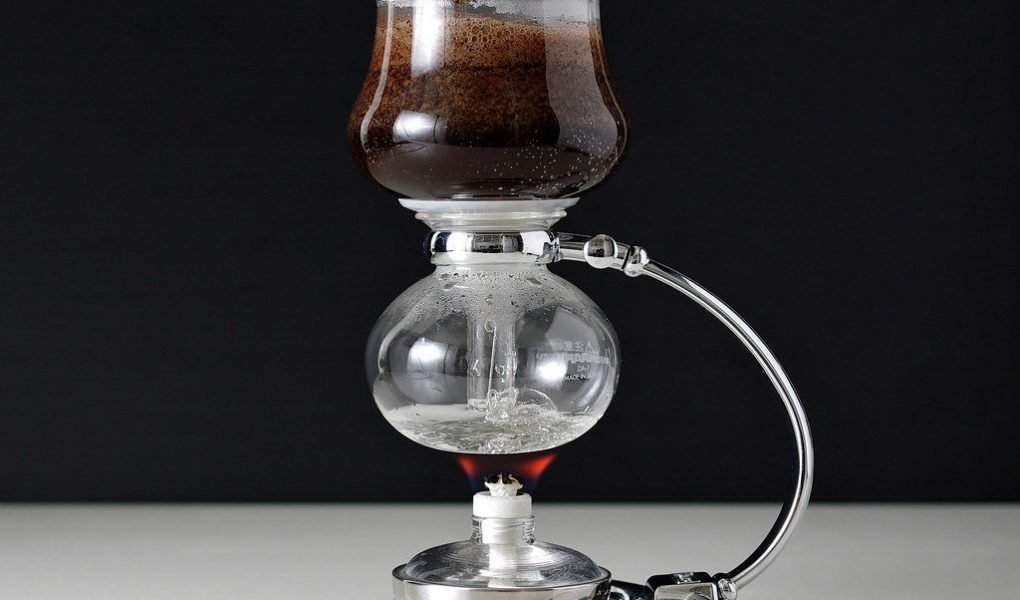
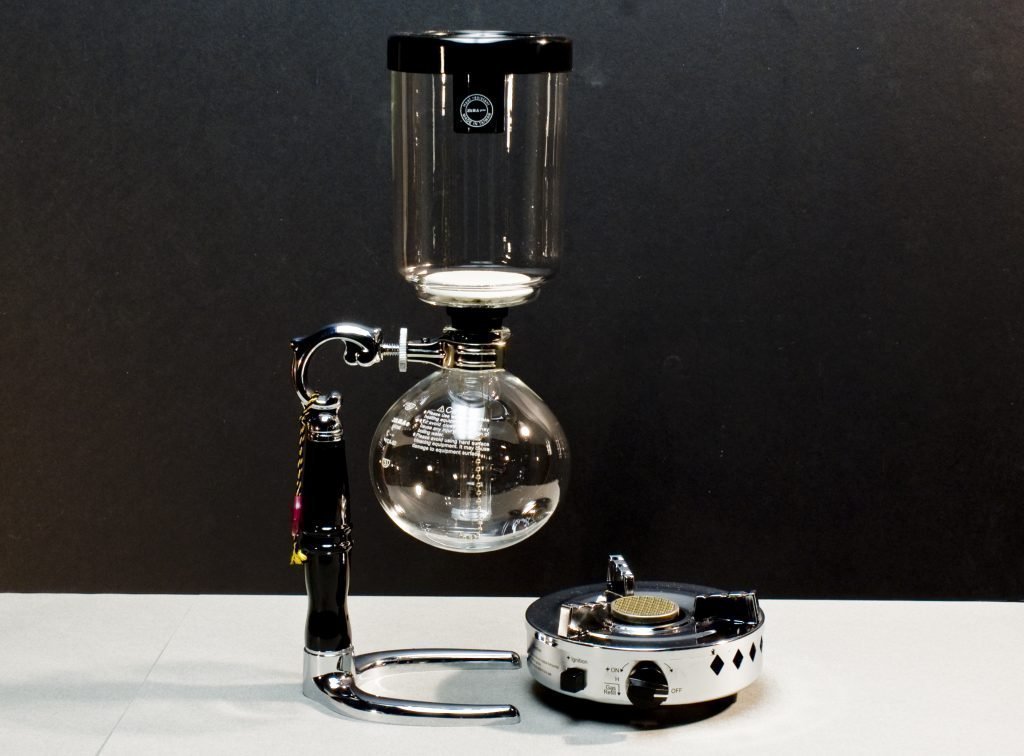
A Siphone coffee maker is brewing device used to create unique tasting coffee. The brewer consists of 4 main parts that combine to create a coffee with definite scientific elements involved. These 4 parts include:
- A top section – This is where the coffee sits above the heat source and begins to brew.
- A bottom section – This section contains the hot water which transfers heat to the coffee above.
- Filter – The filter is to prevent the coffee sediment from being in your cup.
- Heat burner – The heat burner can be a hot plate or gas burner, and is used to heat the water in the bottom section.
The Siphon Coffee Maker was invented by Loeff of Berlin in the 1830s. There had been a lot of design changes from the original vacuum pot before finally becoming the siphon coffee maker we’ve come to know and love.
The device is simple to explain, the heat source will start to heat the water and gasses will end up leaving the section. This allows for a vacuum to be created in the section where the water is. As the water heats it begins to transfer to the top compartment mixing with the coffee. This is where the brewing starts.
Once the water has transferred and the coffee has been brewed, the heat source will be turned off. As this happens there is a reverse effect where the brewed coffee will begin to transfer to the bottom section. The filter will catch the coffee grounds as the water passes through, and you are left with the perfect cup of coffee.
According to coffee enthusiasts, the siphon coffee-making process is both a culinary pleasure and a masterful performance. It both delights the palate and indulges all your other senses. Just watching the whole process will definitely amaze you in the best way possible.
Yama Glass Siphon Vacuum Coffee Maker
Diguo Belgian Siphon Coffee Maker
Beginner Tips On How to Use a Siphon Coffee Maker
There are certain things as a beginner you should note. Most people that make a mistake when brewing a coffee with a new method give up because they think that it produces a bad coffee. However, it can be a very simple step that they missed out which causes the outcome to be poor.
Remember these tips when brewing your Siphon coffee:
1. Always Remember to Use Freshly Boiled Water – This will lessen the time you need to wait when using the siphon coffee maker. If you start with cold water then you will be waiting around for a while. Equally, the coffee will be exposed to oxidization which can diminish the flavor.
2. The Ideal Grind Size is Medium-Fine – This will help you get the best result for your coffee. If in case you use a finer grind and notice that the coffee gets “stuck”, just blow into the bulb, this will help create the vacuum effect. Ideally, you want grounds thick enough to not get stuck and fine enough for water to pass through absorbing flavor.
3. Never Use a Metal Spoon – If you don’t want to break your glass and break down in tears, stay away from metal spoons. The sections will be very hot, a wooden spoon is essential when dealing with hot glass.
4. Make Sure to Soak Your Fabric Filter In Between Uses – Try to store your fabric filter in a container filled with water and store it in the fridge. This prevents chemicals and other matter from a dry filter from entering your cup.
How to Use a Siphon Brewer
The Basics of How to Make a Siphon Coffee
A siphon coffee maker might seem hard to set up at first, but you can perfect the process the more you practice. The secret to making a good siphon coffee is to know and control the perfect time and temperature.
Make sure that you follow the steps below in order for you to create the perfect siphon coffee.
1. Remember to Soak the Fabric Filter for 5 Minutes
This step is important for the reason that by doing this process, you’re able to remove any aftertaste and lingering odor. Once you are satisfied with the result, put the filter into the glass chamber and slowly pull the spring wire through the tubing. Hook the wire on the bottom edge.
2. Measure and Grind Your Coffee
The ideal weight for the coffee beans is about 20 grams. After you’ve properly measured your coffee beans, grind them into a medium-fine grind. You can always add more coffee beans if you prefer a stronger cup.
3. Pour Boiling Water into the bottom Chamber
After you’ve prepared your ground coffee, add 2 cups of freshly boiled water into the bulb or the glass chamber. To give you better measurement, you can always fill up the bulb up to the line
4. Put the filter in the top section
The spring attachment needs to be coming through the top section to catch the filter. You should then take your damp filter and place it in the bottom of the top container. Ensure it’s evenly spread across the container to make sure you get the best result.
5. Fire Up the Burner and Place It Under the Bulb
Once you’re done setting up the basics, place the top portion of the siphon (remember to keep the filter in place) into the bulb and gently seal the rubber until you know that it’s safe and secure. Now, put the burner underneath the bulb.
6: Attach the top section to the bottom section
Now you are ready to join the two sections. Attach the top section to the bottom section leaving it loosely fitted. There will be different guides on this depending on the type of attachments you use.
The reason to leave it loose is to avoid starting the brewing process before the coffee is in the top. This would waste the water and mess up the process.
7. Wait for the Water to Boil
This will be the fun part of the process because here you’ll see physics working its magic.
The ideal temperature for the water to boil is 190-200 °F, to easily check the temperature for the water, place the temperature inside. As the water begins to boil, you’ll notice that the water will slowly rise to the top hopper part.
Don’t worry if you see a bit of the water staying at the bottom chamber, this is normal. Once you’ll notice that the water has moved to the top, turn the heat down on the burner.
8. Pour you Freshly Ground Coffee
After the water has reached the top chamber, pour your freshly ground coffee into the top hopper part where the water is already. Make sure that the entire coffee ground is completely covered in water, use a spoon to help you.
9. Stir the Coffee
You don’t need t stir the coffee continuously as it needs to time to sit, filter, and brew. However, once the top container is full, you should stir the coffee grounds 2-3 times to make sure they are saturated.
10. Keep Track of Time
Wait for about 1 minute for the coffee to be fully extracted. You’ll know that the extraction is complete when you notice that no bubbles are forming inside the top part anymore.
11: Remove the Heat and Remember to Watch Everything
This is probably one of the most important steps. Watch the process. It is mesmerizing to observe the way the coffee transfers and brews, like a science class using beakers and burners.
Turn the burner off and swiftly stir the coffee using a spoon. As the heat is removed and the temperature drops, you’ll start to see the coffee slowly being sucked into the bottom chamber.
12. Serve and Enjoy!
Remove the top hopper part from the bulb using a cloth. Allow the coffee to cool down a bit and then serve!
Key Take-Away
The Siphon Coffee method might seem intimidating to do at first but always remember that practice makes perfect. Once you become better, you will find that it takes less time to prepare the coffee.
Just remember to do the tips stated above and follow the step-by-step guide to help you ease your way in creating the best coffee with a Siphon Brewer. Remember to use freshly brewed water, always use a medium-fine grind, never ever use a metal spoon to stir, and make sure to soak and store your fabric filter in a container and put it in the fridge.